Wednesday, March 30, 2011

Spring Capris

Every year I wish I had more spring and summer capris and shorts. They are so expensive to buy, so I've been making some of my own. (Yes, as the snow falls outside. Yes, it's March 30. Crazy.) Today I thought I would teach YOU how to make some too! They are super easy.

Here is what you need: A doll to model, scissors, pairs of shorts/pants/capris/bloomers to use as a pattern, fabric of your choice, and elastic. (I used some old headbands my mom didn't want)

First, lay your "pattern" on the fold.

Cut it out.

Cut another one that mirrors it.

Open and place them on top of each other.

Sew as shown, but only down to the bottom of the curve.

(by the way, I hemmed my pants at this point. It made it some much easier to do it now! Simply fold over twice and stitch along the bottom.)

Grab the middle of the fabric and pull on both sides, making the seams you just made meet in the middle.

Line it all up now. See our pants?

Sew up one leg...

Then up the other! Make sure you do a good "forward and back" to make SURE you won't get holes in the crotch.

Now get out your doll and slide the pants on to make sure everything fits.

I like the length....

Also measure how much elastic you need. It should be enough to be snug around your doll's waist, almost pulling.

Sew a "sleeve" big enough for the elastic all the way around on the top of you pants. Be patient, this is tricky. Leave an opening for you to slide the elastic in.

There it is!

Now, feed your elastic in. This is slow work, so be patient!

Both ends are now coming through the hole.

Sew the ends of the elastic together.

Sew your hole closed now!

And your pants are complete!


Another alternative is to roll them up and wear them like this! Way cute!


Here is another example: I made the shorts Rebecca is wearing last year. I don't own them anymore...I traded them for a jumper. But...they are basically the same idea.

I hope to make some more over the next few days. Hopefully I will have tan, brown, green and denim by the end of this weekend, but we'll have to see!

Tuesday, March 29, 2011

Trips-past and future!!!

I'm so excited: I'm going on a trip for Easter, we're going to the beach. I want to take an American Girl. I usually do when I go on vacation. Here are a few past trips:


This is Rebecca in the Sears tower! Yes, I carried Rebecca around all day in Chicago, she got a train and bus ride....

And an adventure in the American Girl Store! (That was a BLAST if you ever can go I HIGHLY reccomend it)

This is when I took Rebecca to PA in the winter.

And this is Samantha at my Grandma's old house, in PA when we were on another trip.

I've taken Kit to a mountain cabin as well. She got to go fishing.  Samantha has also been to South Carolina at Thanksgiving. (don't have pictures on the internet anymore...)

So, on this upcoming trip, who should I take? And did I mention whoever I do take will get to play with my cousin and her dolls? (remember when I posted pictures of Kit?) Vote on my poll on the sidebar!

PS. I won't be able to post while gone, but I'll take tons of photos to post of Easter when I get home. And don't worry, I'm not leaving until late April.

Monday, March 28, 2011

Doll Play


Sorry for every time I've called this book "Doll Fun." I really do mean, "Doll Play!" I got this book 2 weeks ago Friday, but haven't had time to post about it due to being sick and lots of other things going on. So here we go!


Doll Play could truly be called "the book of endless ideas!" It is GREAT. I made a ton of the projects, which I will show below, but I didn't even use close to 1/4 of them. It's a great book to have on hand when you have "Doll Block" and don't know what to do with your dolls.

I just showed a few of the very cutest ideas here. I loved the hopscotch and frisbee! (haven't made either yet, but I'd like to when it warms up.)

Cute "doll sized" game.

The book came with a tear out scene in that back for you to make into a window. I loved the curtains shown here.

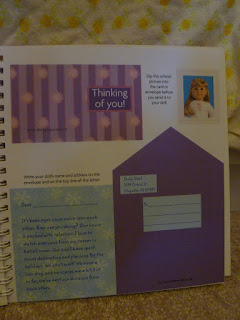
The book has a lot of tear out supplies for you to use in the back. Here is an envelope pattern, a letter, school photo and a thinking of you card.

Double sided banners for you to make your own cinema!

Bowling invitations (3 or 4 are included) dice and watch faces.

Plenty of "Hello My Name Is" stickers, plus stamps and envelope seals for the letters.

So now, my dolls would like to show you their new stuff!


Emily and Kit sitting by the window playing their AG game.

Window. I used the middle waistband of an old stained dress of my younger sister's to make the curtain. You could use this idea on an photo you have of a house or trees, but it was nice that AG gave you one.

Game. I made the dice from the kit and used beads to make the game peices.

The book suggested that you use mini rubber bands for bracelets for your dolls. These green ones matched Kit's shirt!

Molly is wearing her new locket. I used my AG Stickers) to make each girl a photo necklace!

They love the fact that it has their name and photo.

Ellen is reading some mail from a friend.

These came with the kit.

She also has new photo frames on her wall. (AG Stickers glued on foam!)

Emily and Kit have a new mirror. (also a Doll Play idea)

These two young ladies just came in from shopping!

Samantha has a nice green handbag. (A change purse with a ribbon shut into the top.)

Rebecca also has a handbag and a cool watch.


Kit wanted to show you something else now. Remember when I showed you my free AG magazine? Well, there were ideas for cute habitats in it. For her 8th birthday, Kit got a butterfly garden!

Here is her fish tank, which she got last year and new butterfly habitat!


Kit is so excited because she loves animals.